Foundry VTT on DigitalOcean with SSL and PM2
I absolutely LOVE Foundry Virtual Tabletop (FoundryVTT). It is by far the best $50 I’ve spent on my tabletop role-playing hobby in years. I can gush about the software on and on, and perhaps I will in a future post. This post, however, focuses on something a bit more practical.
For years, I’ve hosted my instance on AWS, but with the change to their public IP address pricing, it doesn’t make sense to stay with them since DigitalOcean offers a beefier solution at a lower monthly cost.
Here’s what I’ll walk you through today:
- Setting up a DigitalOcean droplet
- Setting up a domain name for your server
- Setting up a self-renewing SSL certificate
- Installing FoundryVTT on Ubuntu
- Running FoundryVTT as a service using PM2
At the time of writing (January 15, 2024), the current version of Foundry is 11, so these instructions could change in the future. However, they were practically identical two years ago when I installed version 9. But, YMMV.
Setting up a Droplet
Log in, or create a DigitalOcean account, first. Once you’ve done that and logged in to your dashboard, create a droplet.
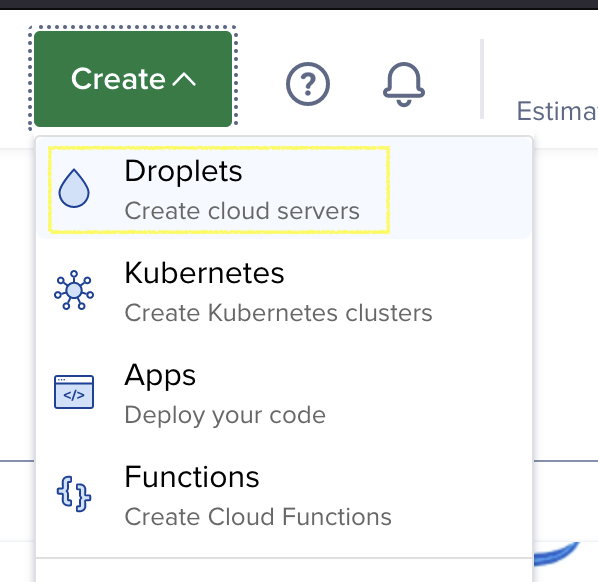
The physical location you pick matters quite a bit since the distance from your players to your server can affect gameplay. If there’s much latency, things such as token movements and dice rolls appear sluggish, so pick something nearby.
Next, pick the Ubuntu machine image. I picked Ubuntu 23, and the rest of this post will assume that you’ve done the same.
For the authentication method, I suggest setting up an SSH key since it is the more secure option. I also picked the free improved metrics option, which allows you to monitor server stats from your DigitalOcean dashboard.
For Droplet type, pick “Shared CPU” and the “Regular” CPU option, the most affordable selections. Since Foundry requires at least 2 GB of RAM, pick the 2 GB/1 CPU plan. I don’t think you’ll need more than that since most of Foundry’s computational complexity is performed in your player’s browser window. However, you can pick something beefier than that if you think you’ll be installing many modules or plan to run other things on the server.
Finally, click “Create Droplet,” and you’re done.
Domain Setup
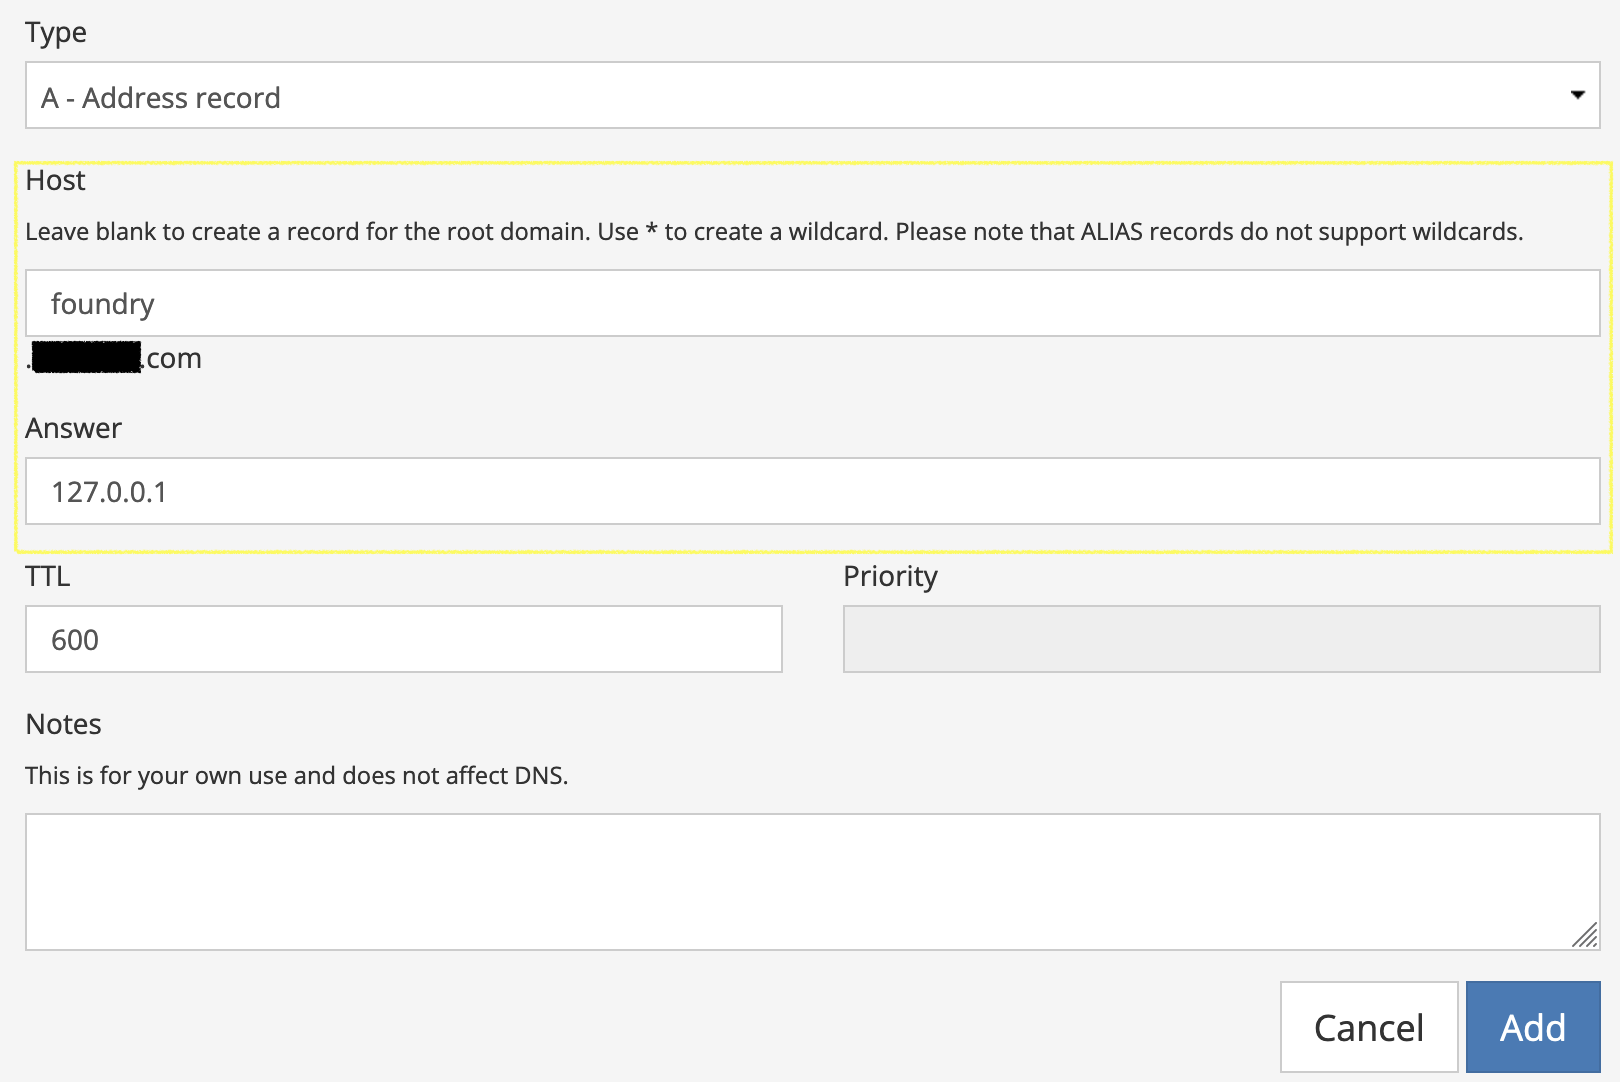
Once your Droplet finishes creating, note its public IP address. Next, using your registrar of choice, add an A Record for your domain name. If you want a subdomain (e.g.: foundry.example.com), enter something in the “Host” field, but if you want the root domain (e.g.: example.com) to host your Foundry instance, leave it empty. For the “Answer” portion of the record, enter your Droplet’s public IP address. Add the record and you’re done with this step.
Logging In
Next, we’ll log in to the Droplet and begin setting up some prerequisites. The method of how you log in to your server depends on whether you chose the SSH or password-driven authentication method during Droplet creation. However, there’s a web-based console available, which works in a pinch if you don’t want to mess around with terminals.
If you do, you can SSH as root using ssh root@THE_IP where you must substitute THE_IP with your server’s public IP address or the hostname you set up in the previous step.
Once you’re logged in, verify that you’re logged in as root by executing the whoami command. If the answer is somehow not root, switch by executing:
sudo su -
Next, we’ll update the server software:
apt update && apt upgrade -y
This simply upgrades any pre-installed programs already on the server and ensures that you’re starting from a clean slate. If you are prompted by anything during this process, simply pick the default options since this is a brand-new installation. Once complete, reboot the server if after updating it is recommended to do so:
reboot
Your connection will be terminated while your server restarts. Once restarted, SSH back into your server as root and install the prerequisite software for our project:
apt install -y unzip certbot wget
We’ll need the unzip command to extract the FoundryVTT ZIP file we download later, certbot to set up an SSL certificate, and wget to download the FoundryVTT ZIP file.
Installing NVM
Foundry is a Node.js application, so, naturally, we’ll need to install it on our server. However, rather than installing Node.js through our package manager, we’ll use the Node Version Manager (NVM) to manage our installation. This program allows for easy installation of Node.js runtimes and upgrading to new ones once the time comes.
Run the following command:
wget -qO- https://raw.githubusercontent.com/nvm-sh/nvm/v0.39.7/install.sh | bash
Since this post is written at a fixed point in time, it is worth verifying that this command is still the correct one in the NVM documentation.
Accept any prompts that are presented and once installed, execute the following command:
source ~/.bashrc
Verify that NVM was installed correctly:
nvm --version
Which should output a version number.
Installing Node.js
Now that NVM is installed, we can install Node.js, which is as simple as running:
nvm install --lts
Once completed, you can verify the installation by running the following command, which should match the LTS version number stated on the Node.js official website:
node --version
Installing FoundryVTT
We’re fairly well-equipped to install Foundry on our server at this point. Yet, there are a few more steps that remain. First, ensure that you’re in the root user’s home directory:
cd ~
Now, we’ll need to create two directories for Foundry to work correctly. First, the user data directory which hosts all of your modules, maps, characters, uploads, etc. This is also the directory that you’d backup if you so desire:
mkdir foundrydata
Second, create and cd into the Foundry installation directory, which simply hosts the core Foundry software. You don’t need to backup this directory since there is no configurable or user data present here:
mkdir foundryvtt && cd foundryvtt
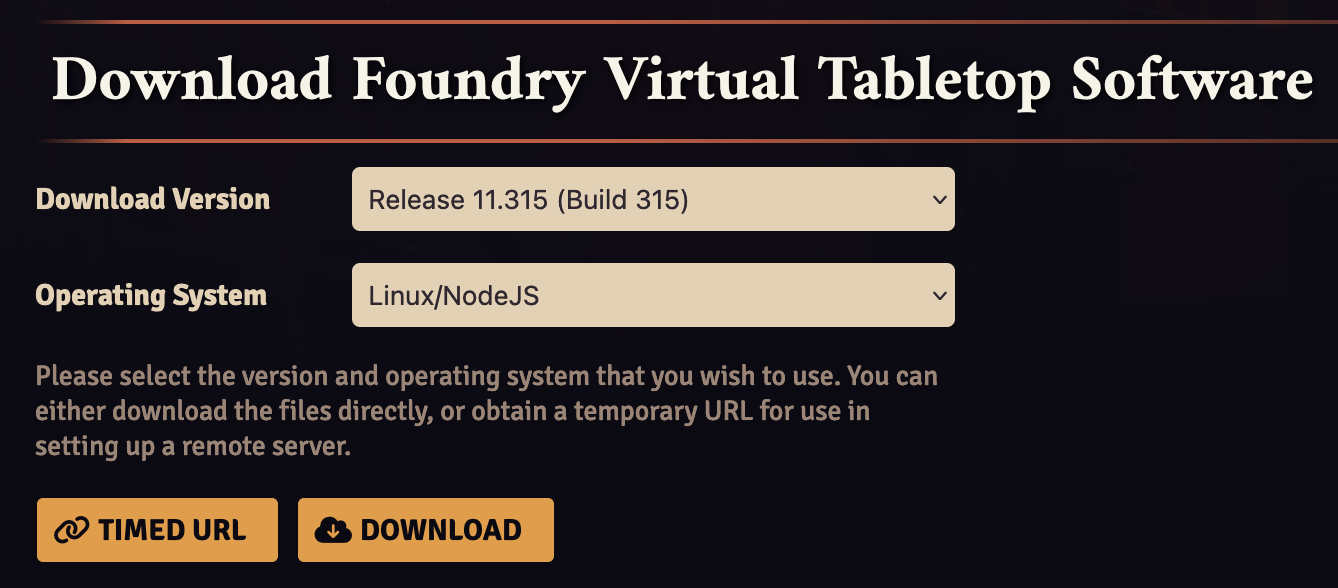
Next, log into your account at foundryvtt.com. Next, click on your username, then navigate to the section named “Purchased Licenses.” Here, select the recommended release version from the dropdown, “Linux/NodeJS” as the operating system and click the “Timed URL” button. You now have a temporary download link to a Foundry installation package in your clipboard:
Execute the following command while still cd-ed into the foundryvtt directory, replacing the YOUR_URL bit with the temporary link in your clipboard:
wget -O foundryvtt.zip "YOUR_URL"
Make sure to include the double quotes around the URL or wget may have a difficult time downloading the ZIP file. Once it completes downloading, run ls -l to verify that you see the foundryvtt.zip file in the foundryvtt directory and that it’s not zero bytes long. If it is, your download link may have expired, so repeat the steps above to regenerate a link.
If everything looks good, unzip the ZIP file and delete it once done:
unzip foundryvtt.zip && rm foundryvtt.zip
If you’d rather keep the ZIP file, you could simply move it out of this directory into a safe place, like $HOME.
First Start
Now that Foundry is installed on your server, we’re ready to run it for the first time. This initial start is performed to populate the foundrydata directory with the files and directory structure that we’ll need to do further configuration:
node resources/app/main.js --dataPath=$HOME/foundrydata
Open your browser to the A Record you created in the “Domain Setup” step above, using port 30000 in the URL for the time being until we configure Foundry to use SSL:
http://yourdomain.com:30000/
You should be presented with a screen to enter your license and accept terms and conditions. You can find your license key in your account on the FoundryVTT website. It’s advisable to set an administrator password during this step as well since your instance is exposed to the internet. Once that’s complete, click on the “Configure” button which looks like a set of gears.
Fill out the following fields with these values:
-
Port:
443 - SSL Certificate
-
Certificate:
fullchain.pem -
Key:
privkey.pem
-
Certificate:
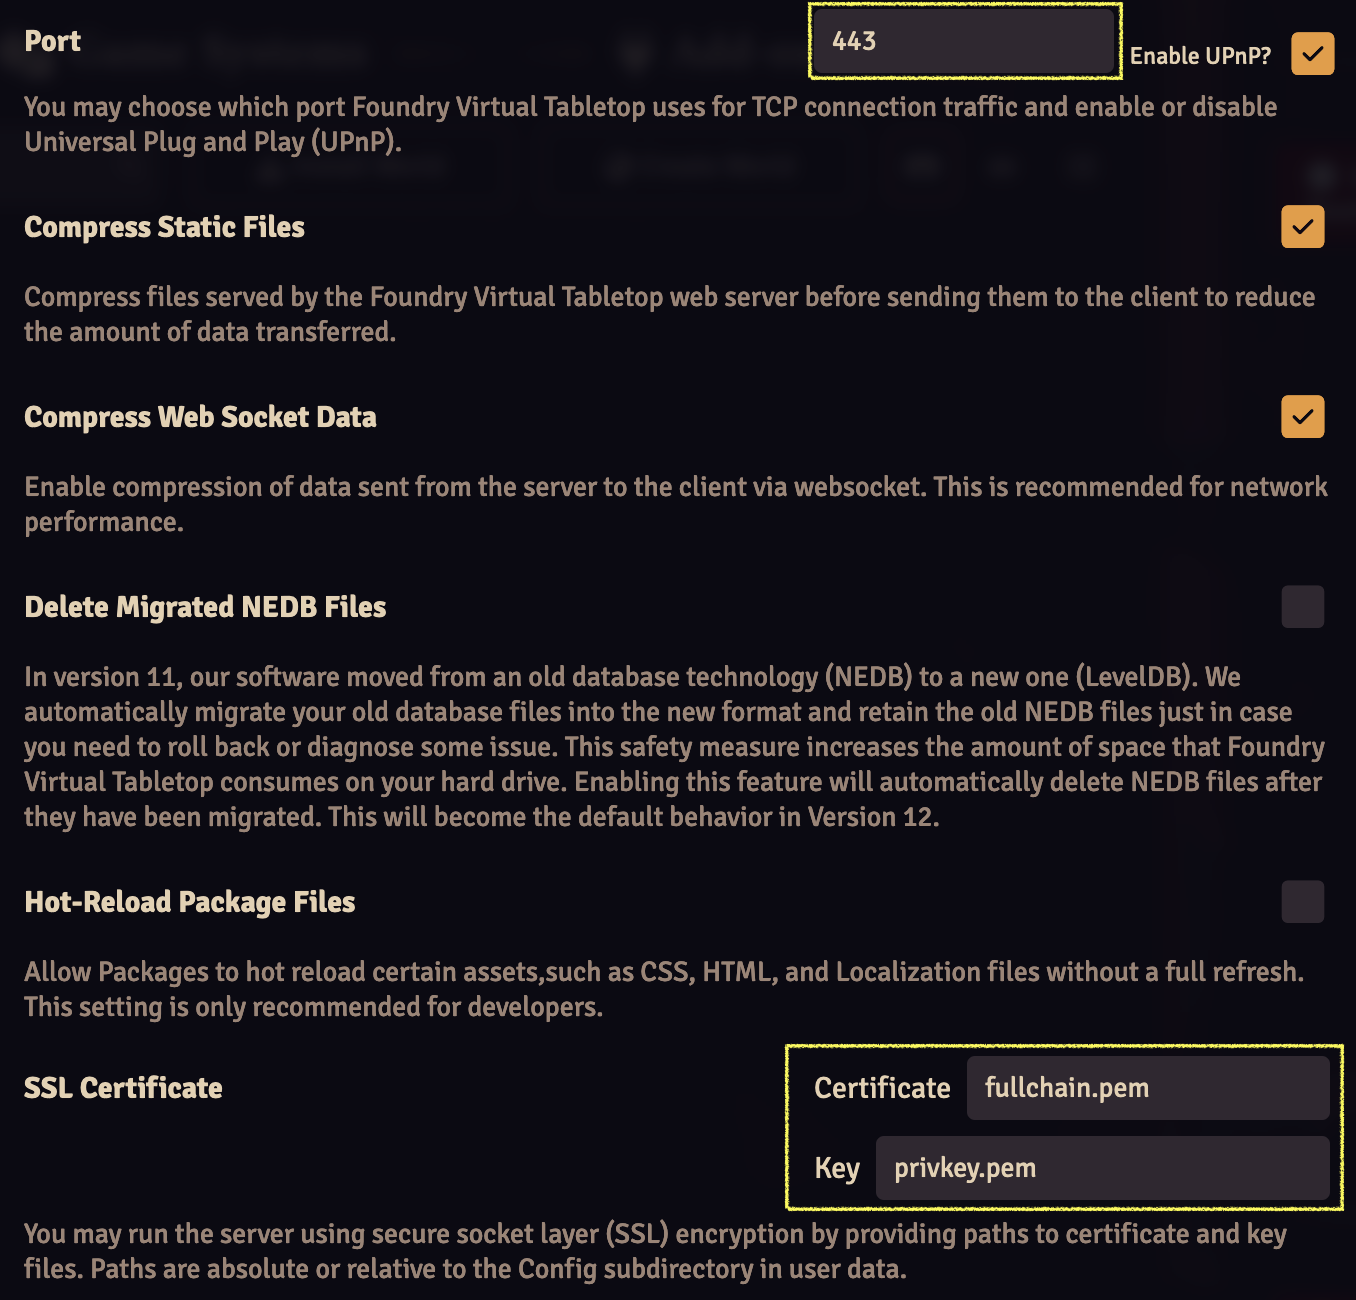
Click the “Save Configuration” button below and close the browser window. In your SSH terminal, hit Ctrl+C to end the Node.js process running the Foundry server.
SSL Certificate Creation
If you only wanted a server that you could occasionally boot up and didn’t mind the random port number, you would be done at this point. However, let’s be a bit tidier and set up a proper SSL certificate from Let’s Encrypt for our Foundry instance:
certbot certonly --standalone -d YOUR_DOMAIN
Substitute YOUR_DOMAIN with your actual domain name and fill out any prompts that may appear. Once this completes, verify that certbot will actually automatically renew your SSL certificates by running:
certbot renew --dry-run
If that looks good, create the following two symlinks in your foundrydata directory, replacing YOUR_DOMAIN with your real domain name:
ln -s /etc/letsencrypt/live/YOUR_DOMAIN/fullchain.pem /root/foundrydata/Config/fullchain.pem
ln -s /etc/letsencrypt/live/YOUR_DOMAIN/privkey.pem /root/foundrydata/Config/privkey.pem
By creating symbolic links rather than copying the .pem files, your server will remain up-to-date whenever certbot auto renews your SSL certificate.
Daemonizing Foundry
Of course, we don’t want to start the server manually each time we want to use it. To automate this, we’ll use PM2 to daemonize the Node.js process:
npm install pm2@latest -g
Run pm2 status to verify that it was installed correctly. Once installed, it’s as simple as adding the process we ran before to PM2:
cd $HOME/foundryvtt && pm2 start resources/app/main.js --name foundryvtt -- --dataPath=$HOME/foundrydata
Now, when you run pm2 status, you should see a process named foundryvtt in the list.
Wrapping Up
You should now be able to visit the same URL as before without having to supply a port. And, with that, you’re ready to use FoundryVTT.
I’ll leave you with a few notes:
Whenever you change the server’s configuration, you’ll be reminded to restart Foundry. You can do so by running pm2 restart foundryvtt. I suggest reading up on some basic PM2 commands in case you run into issues or need to stop and start the process. For example, you’ll probably want to know pm2 log foundryvtt if something goes wrong on the server.
As I mentioned before, it’s not a bad idea to backup your foundrydata directory occasionally. As of version 11, Foundry has built-in functionality to make manual snapshots. I highly suggest reading the documentation on how to use this.
Also, make sure that both you and your players use passwords to gain access to your Foundry instance. Remember that your server is open to the entire internet, so make those passwords nontrivial.
Finally, be careful with upgrading Foundry to major versions. Make sure that all of the modules that you rely on are already compatible with the latest version. If not, wait. Foundry development moves fast and module developers sometimes take quite some time to catch up.
Enjoy!


